Tuesday, December 30, 2008

Daring Bakers: French Yule Log

For this month's taxing challenge, I was able to acquire the assistance of my favorite second-in-command.

This is my littlest sister Julia. She is patient, calming and helpful. In the kitchen, anyway. And I was extremely fortunate to have her; I wouldn't recommend this recipe to any single baker!

This month's challenge is brought to us by the adventurous Hilda from Saffron and Blueberry and Marion from Il en Faut Peu Pour Etre Heureux. They have chosen a French Yule Log by Flore from Florilege Gourmand.

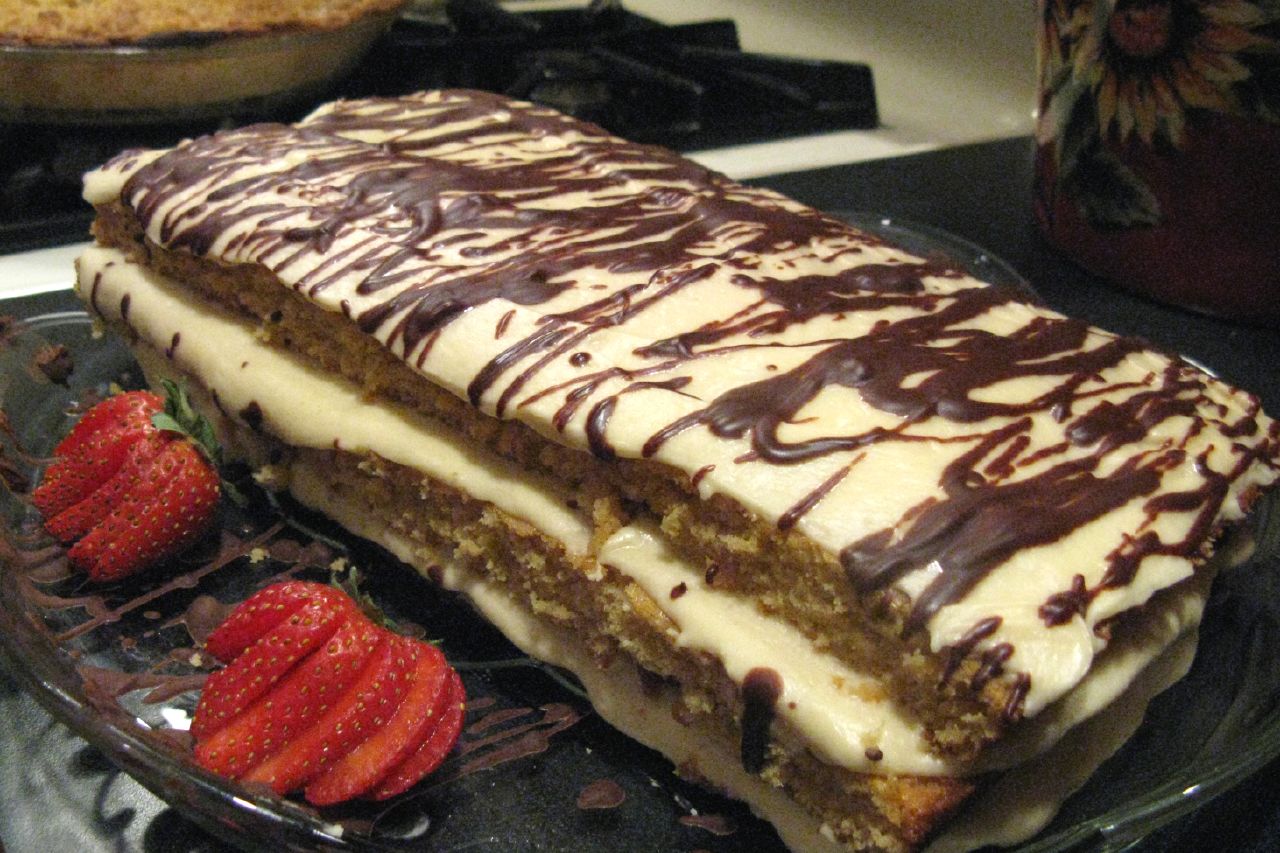
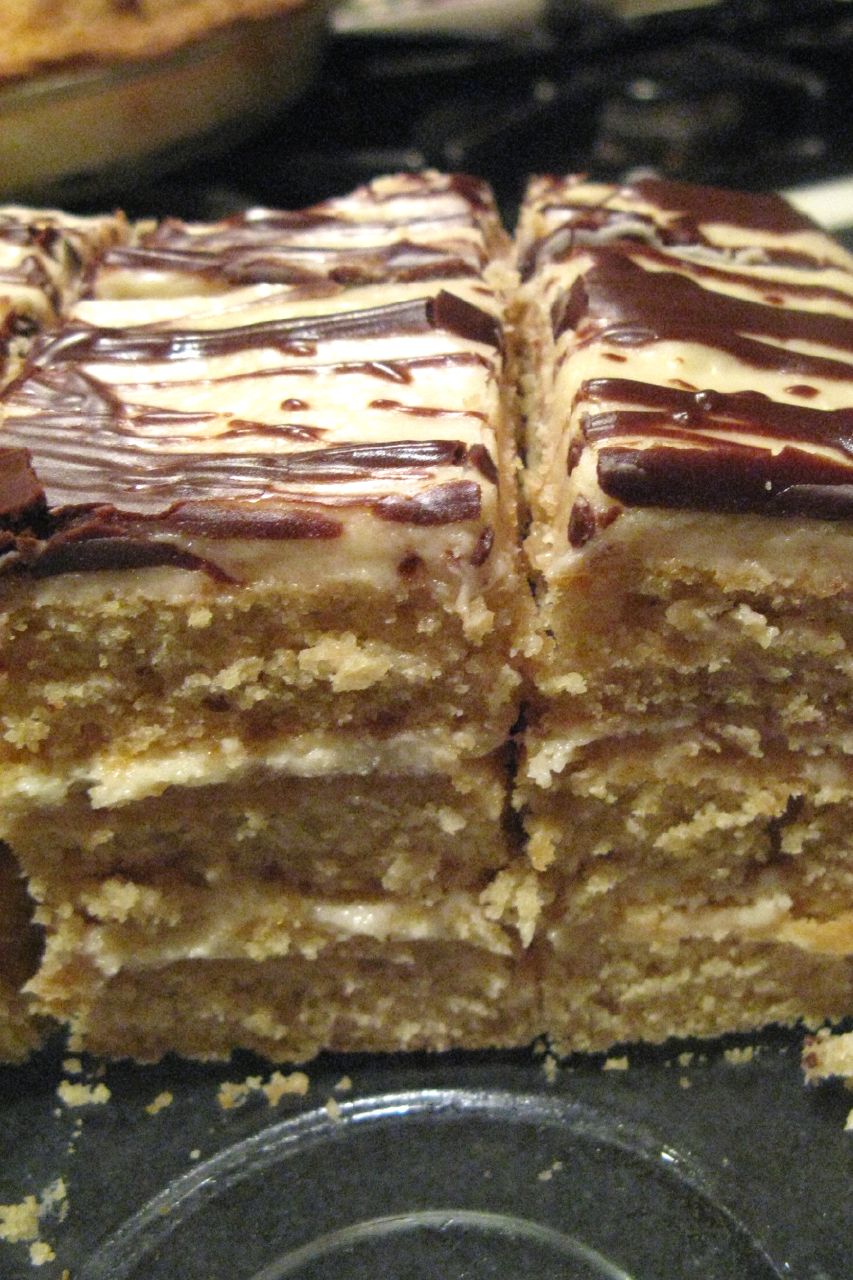
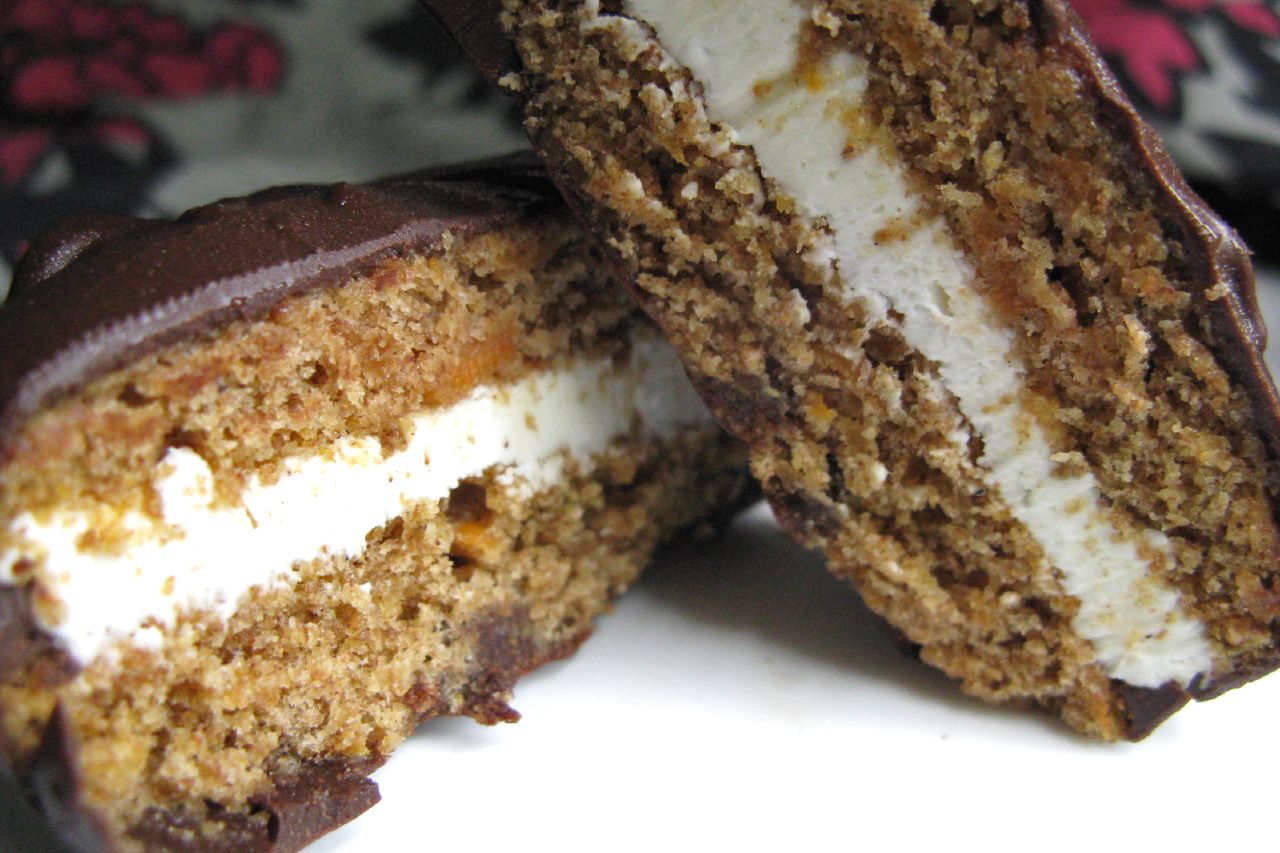
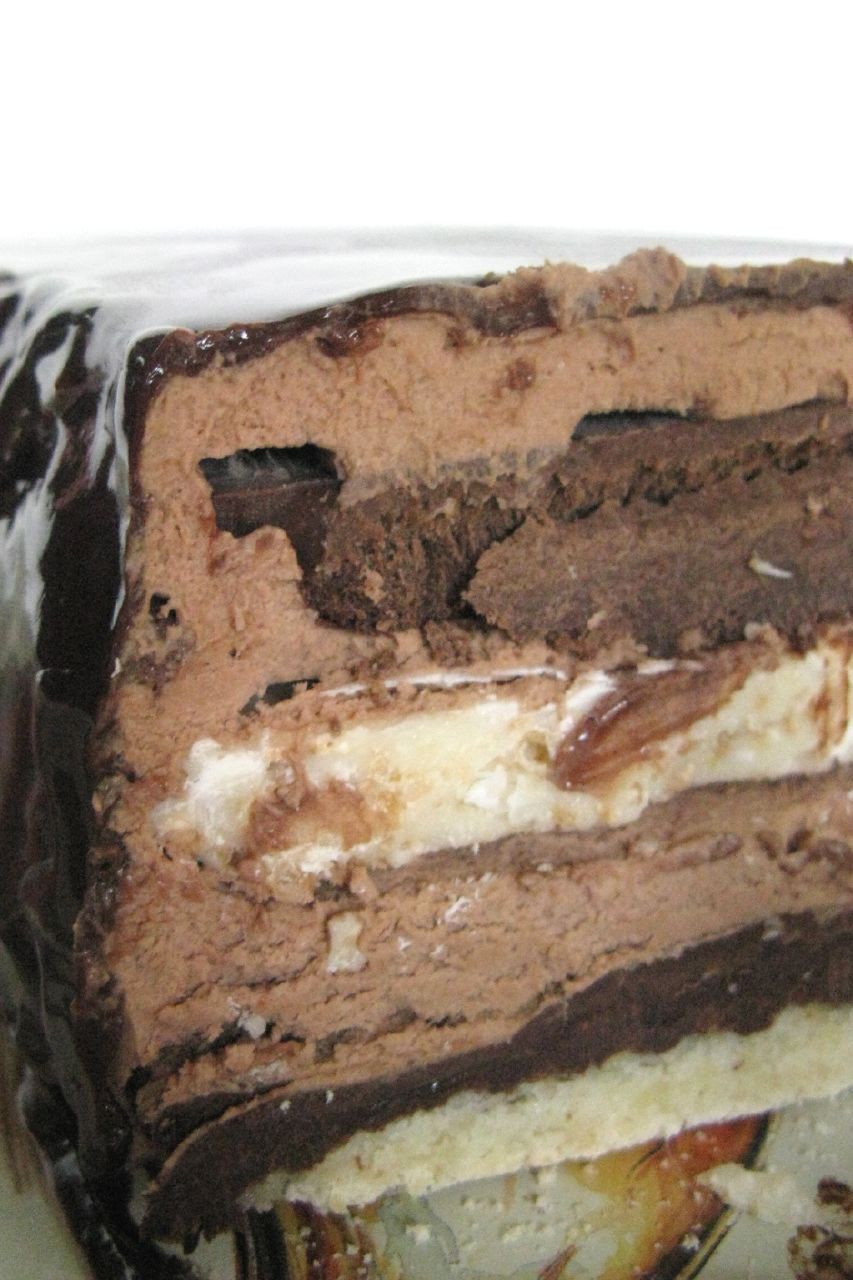
Of the many options provided by Hilda and Marion, I selected a milk chocolate whipped cream for the base of the log, with a chocolate crème brulée insert, a coconut crisp layer, and a dark chocolate ganache and almond dacquoise layer at the bottom. The layers were covered with a dark chocolate icing.

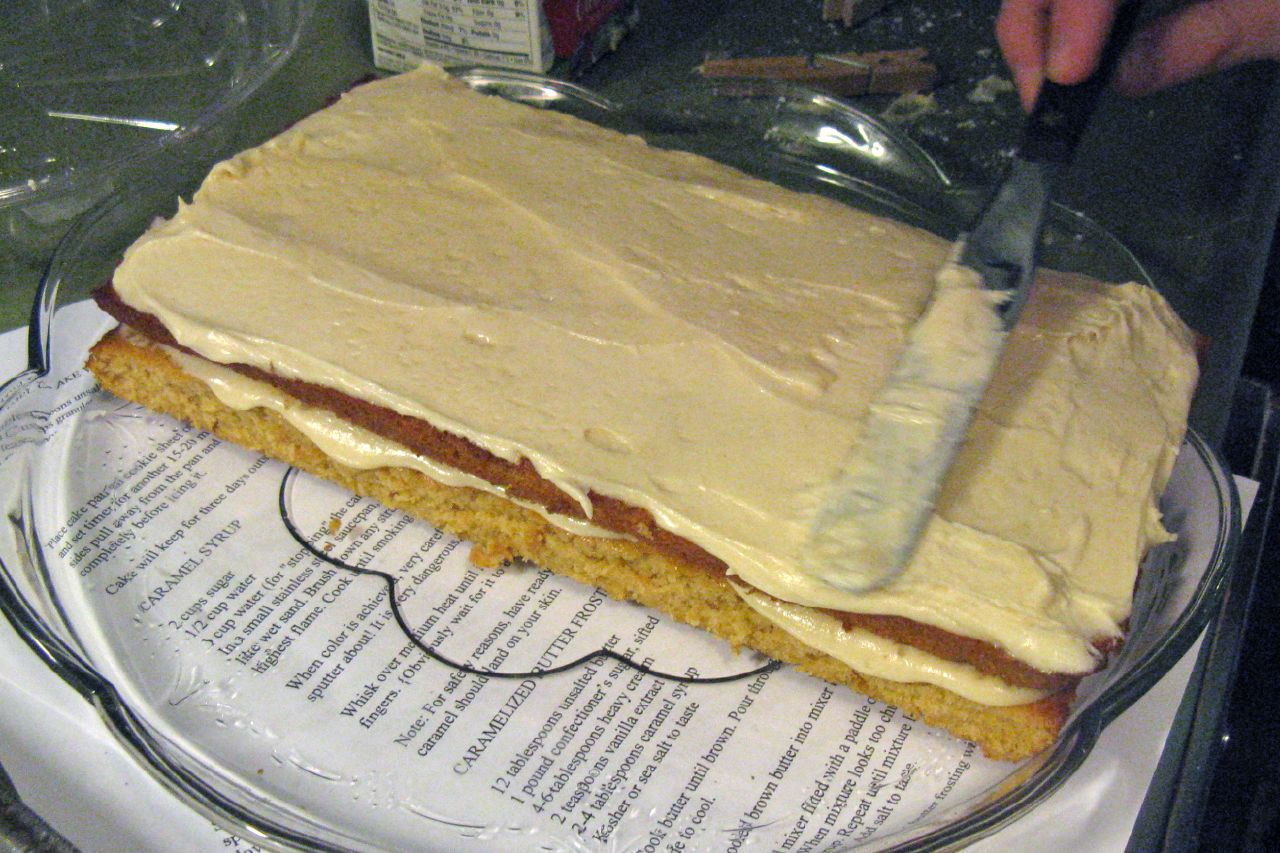
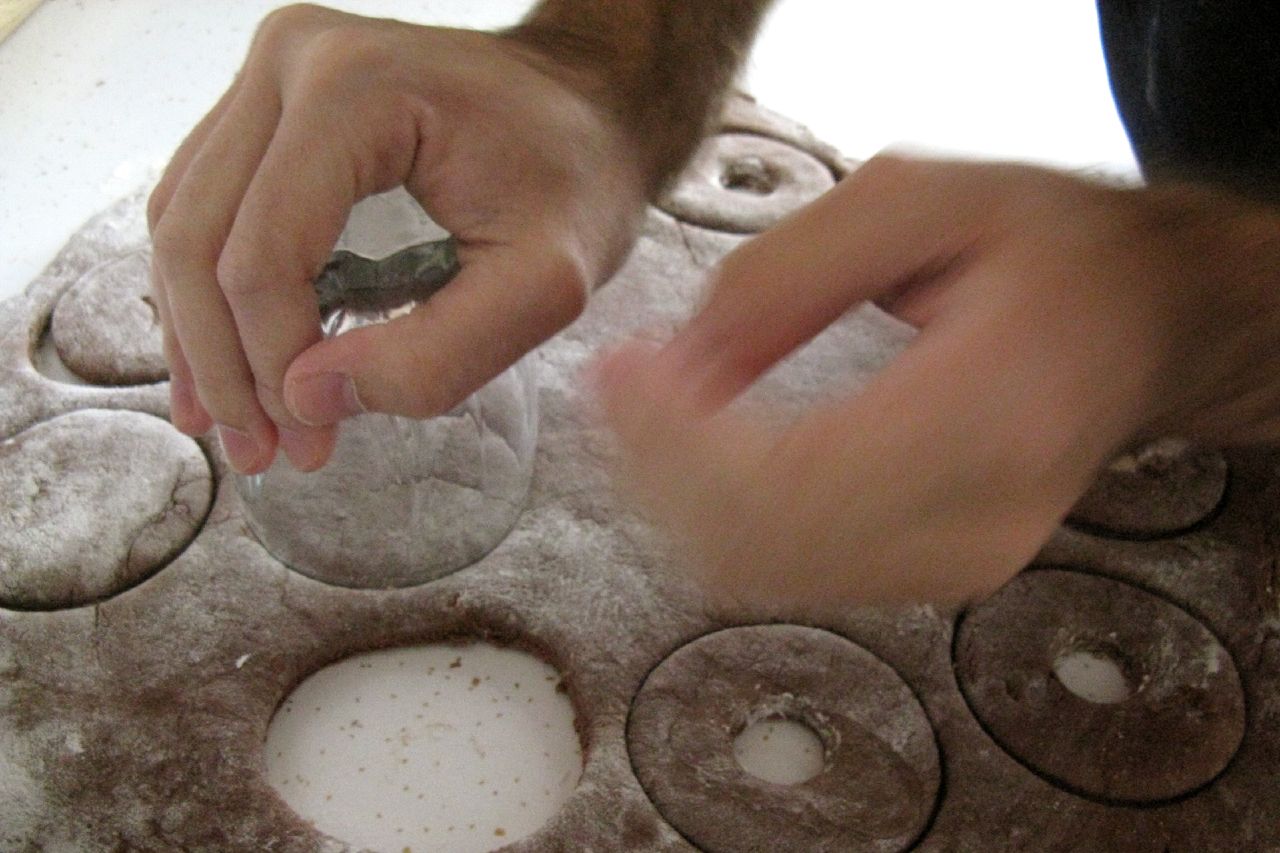
I won't repost the recipe here (you can find it at Saffron & Blueberry), but for those overwhelmed by the complex nature of this concoction, I'll detail the process I used, which covered the span of two days. First, I put together the crème brulée and baked it in the oven. Meanwhile, I mixed the milk chocolate whipped cream and placed it in the refrigerator to cool. I used a toaster oven to toast the coconut for the crisp layer, and mixed the rest of it, spreading it between wax paper to harden. I also baked the almond dacquoise in the toaster oven (multi-tasking!). When the crème brulée finished baking, I placed it in the fridge for one hour. When it had hardened, I whipped the milk chocolate cream and assembled the first part of the log. I allowed it to freeze for several hours, then mixed the dark chocolate ganache and added it, along with the almond dacquoise layer. The next day, I removed the frozen log from the freezer and covered it with the dark chocolate icing. This may sound daunting, but it's fairly enjoyable and fast-paced with two people. The most difficult part, by far, was the waiting!

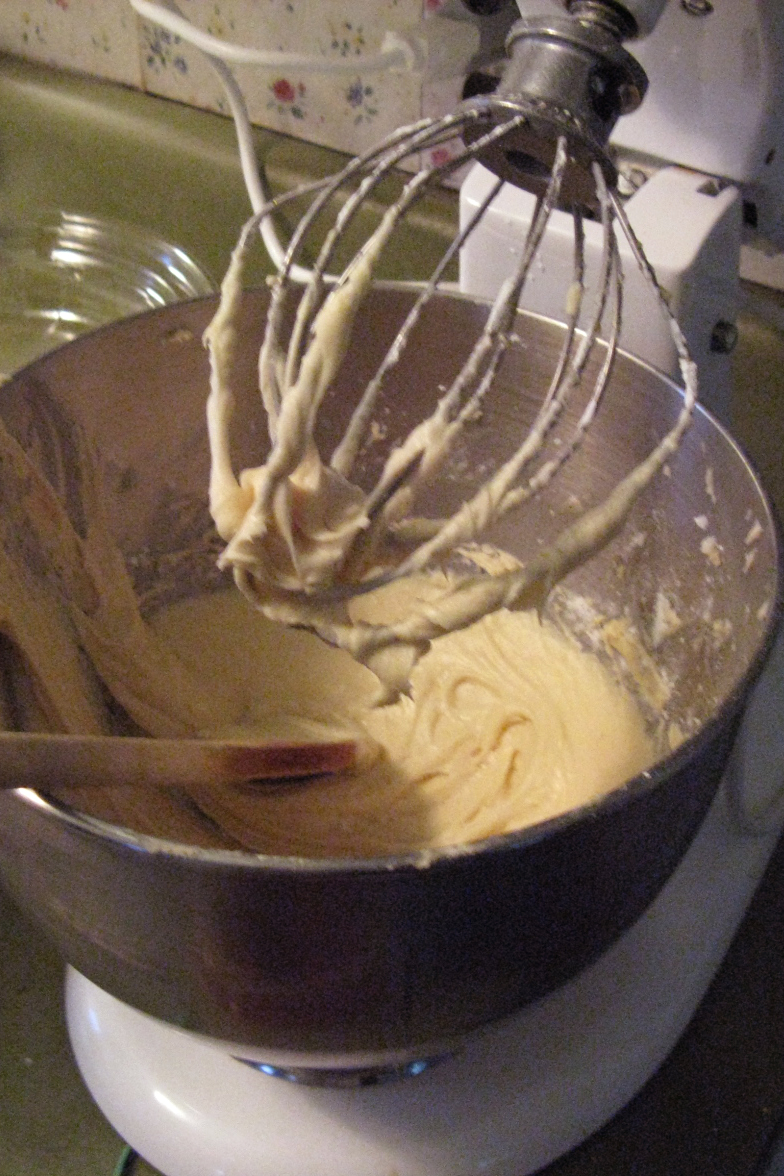
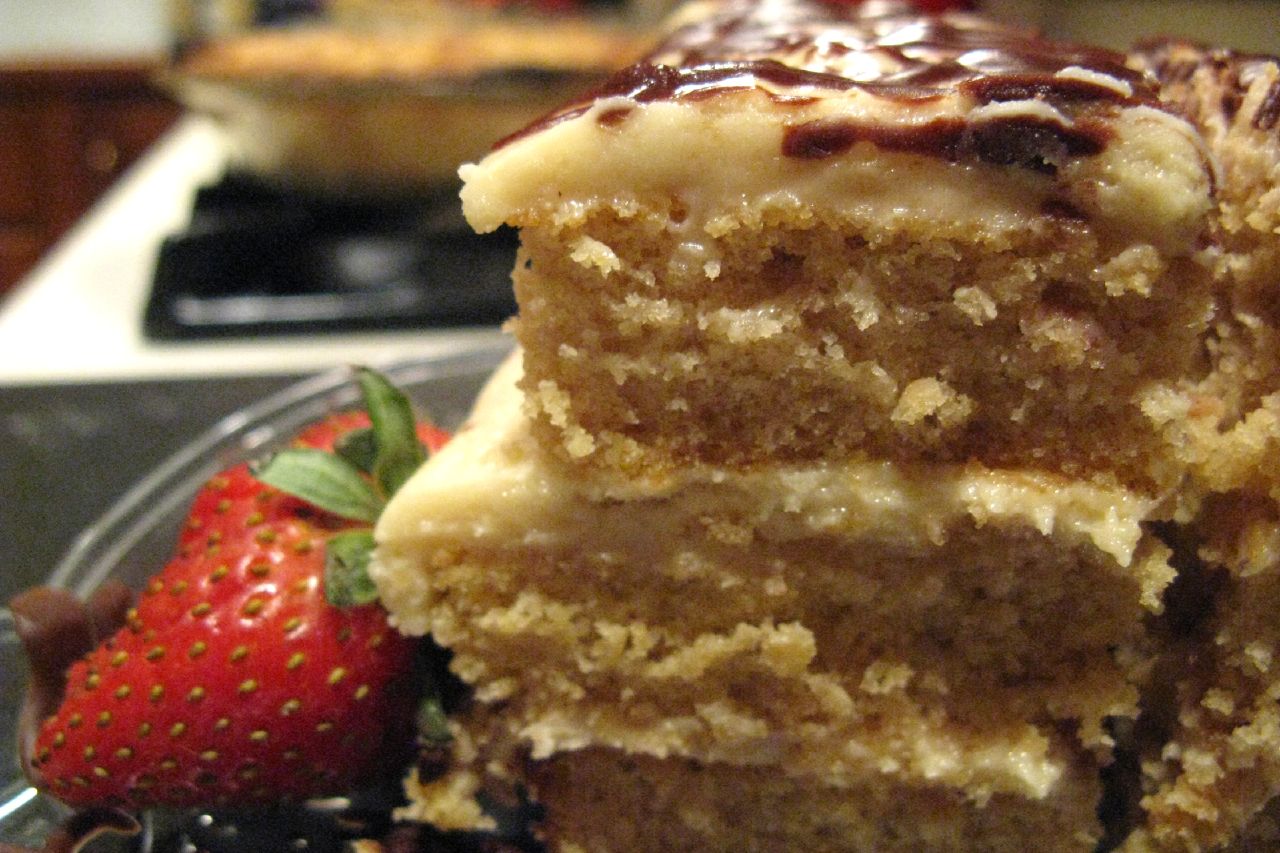
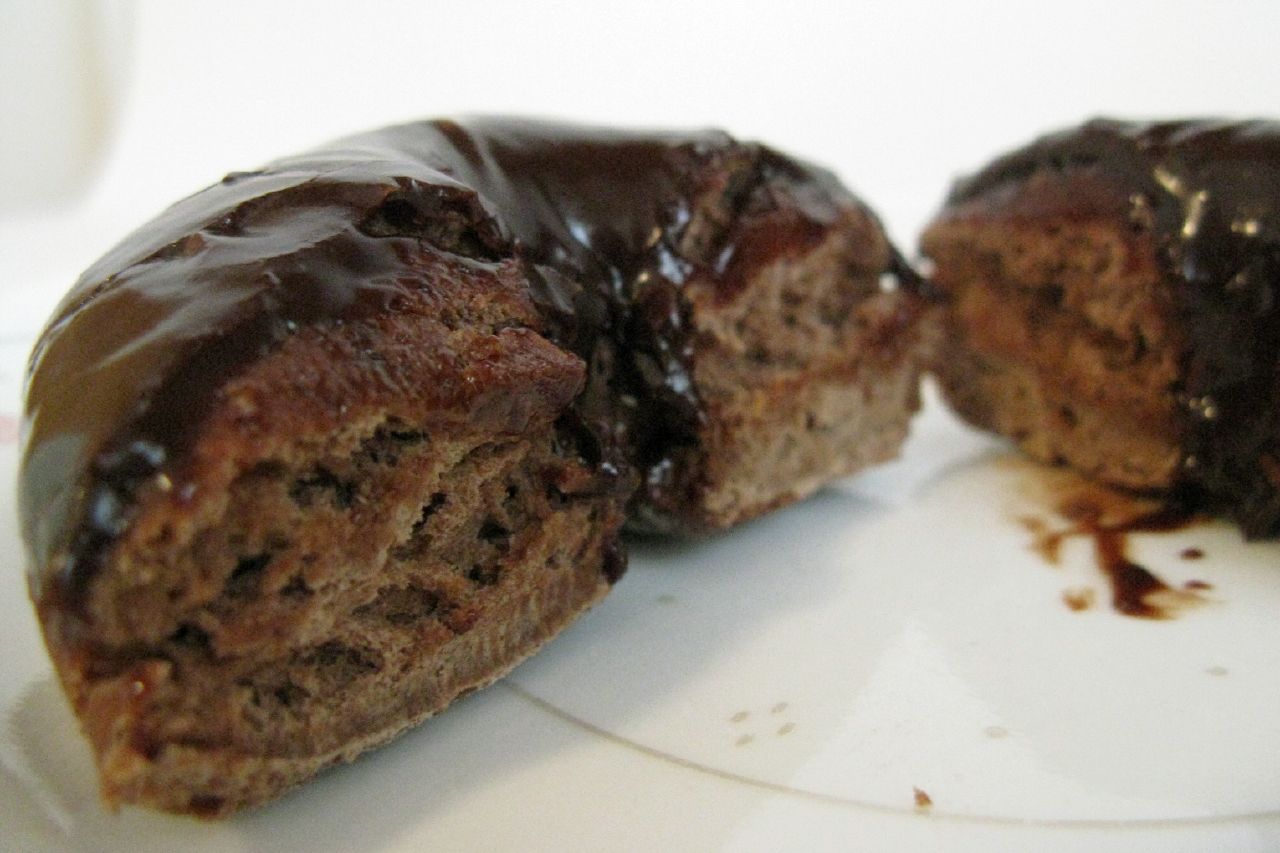
My favorite portions of the log were the milk chocolate whipped cream and the dark chocolate icing. I will most definitely use these again. I also enjoyed the coconut crisp layer, for which I used white chocolate, coconut, and crushed Special K! This would be a great candy by itself.

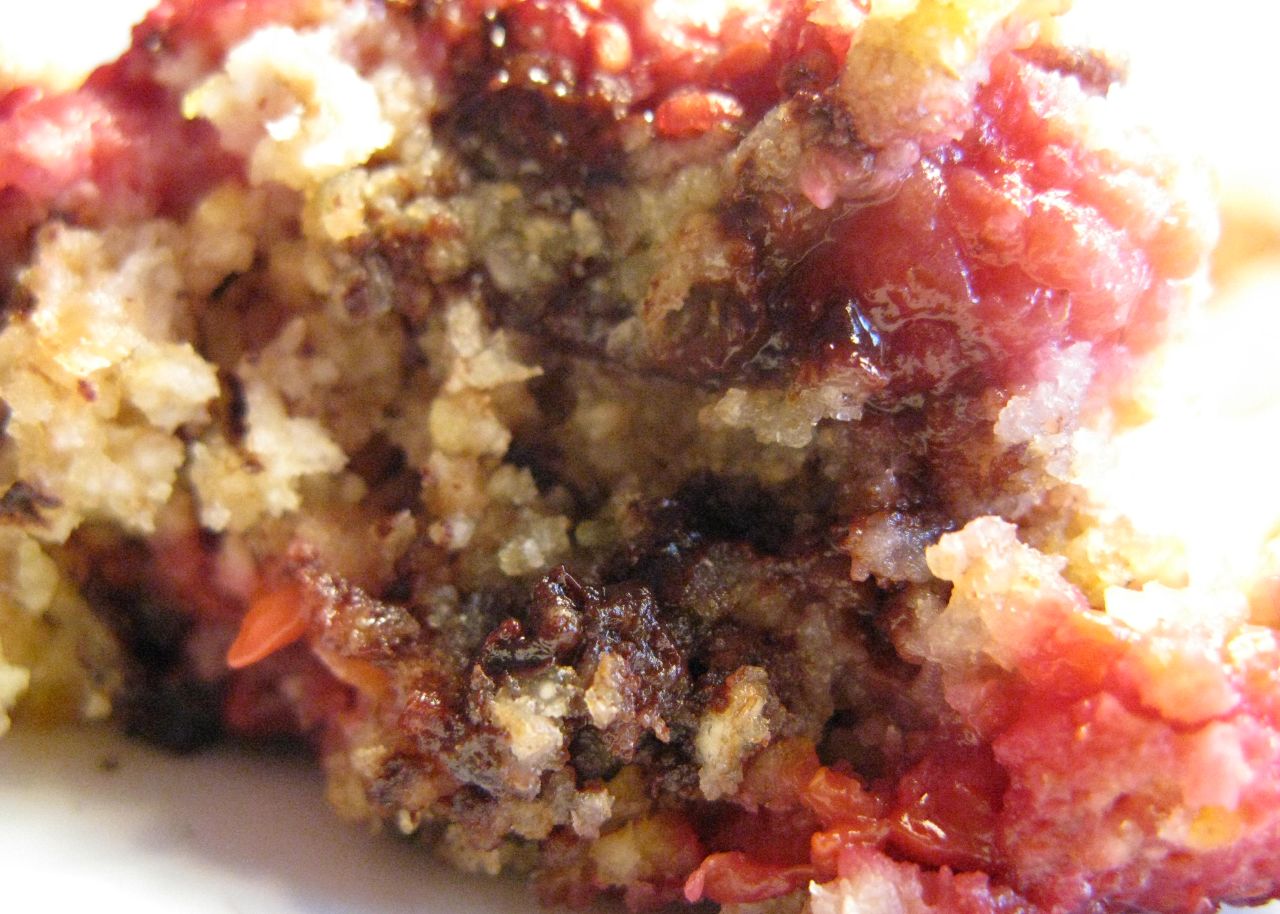
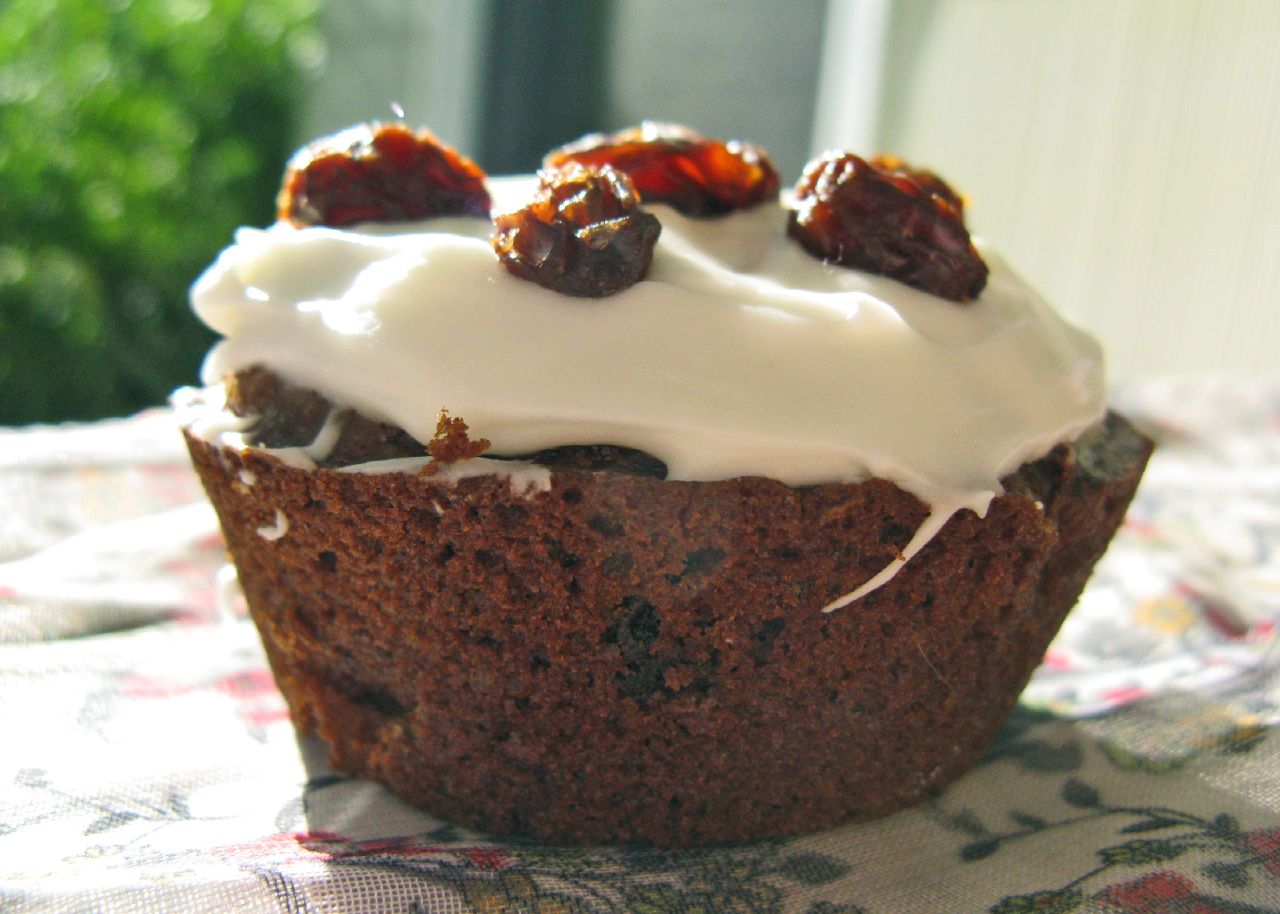
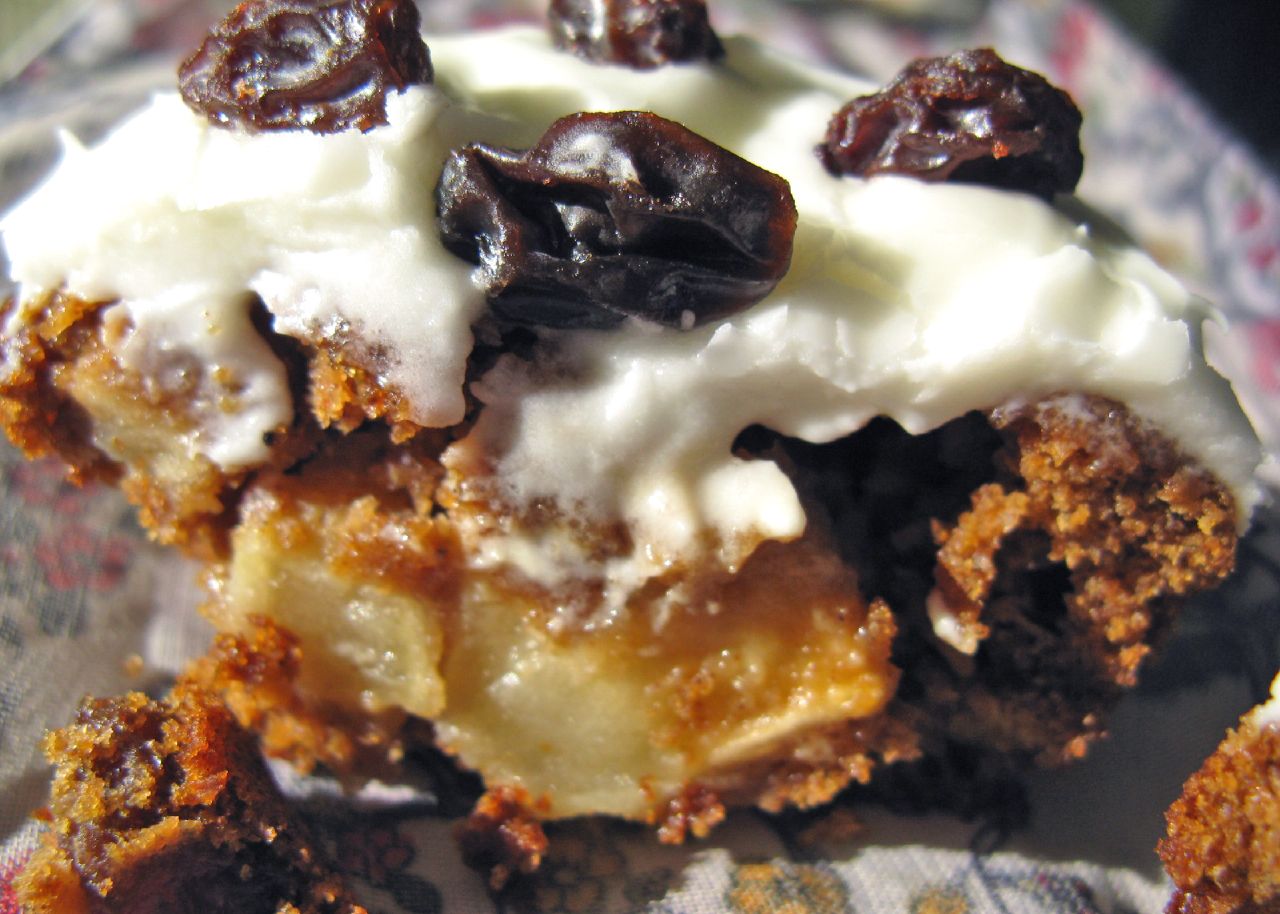
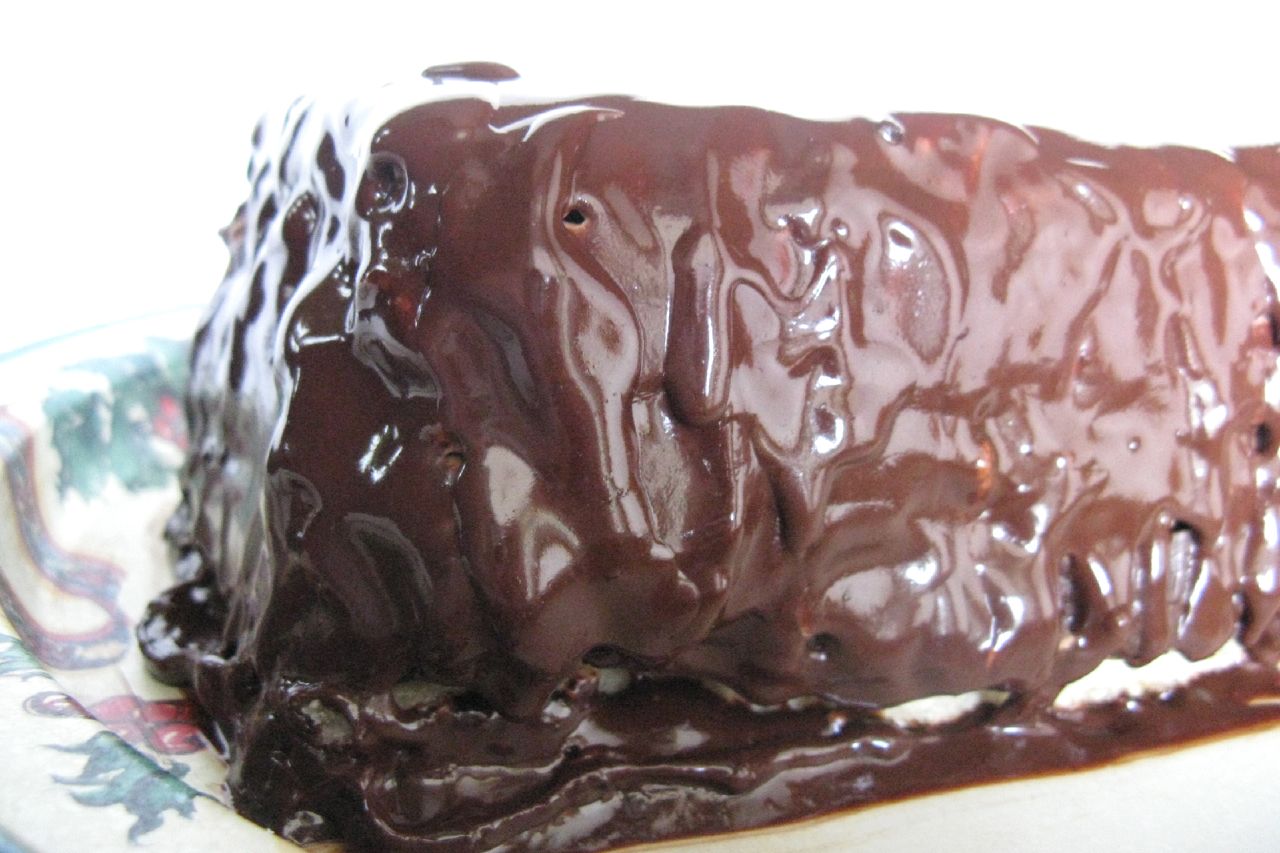
Due to my own impatience and lack of a proper pan, this is not the most immaculate of yule logs, but this in no way affected the taste!

Thursday, December 4, 2008

Another Berry Recipe: Multigrain Chocolate Raspberry Muffins

This will be my third iteration of a recipe involving chocolate and berries. Although I'm attempting to diversify my baking repertoire, my choices are severely limited by money, time, and the tastes of those who consume my recipes. Additionally, I am fond of experimenting with whole grains.

One of my favorite ingredients is Bob's Red Mill 8 grain hot cereal. The price on their site is $3.45, but it's often on sale at Shaw's, and I make porridge with it on cold mornings, and put it in so many of my baked goods. If you can't find this, any hot cereal or grain will do, including plain oats.

The frozen raspberries in this recipe are also relatively cheap, and an amazing way to remind one of summer. Which seems, by the way, too far gone to remember. I suggest you eat these warm out of the oven to avoid contemplating the fact that we have 5 MONTHS left of these dismal weather conditions. Those of us who live in the Northeast, that is.

Whole Grain Raspberry Chocolate Chunk Muffins

3/4 cup milk
1/4 cup butter, melted
1 egg, beaten
1 cup whole wheat pastry flour
3/4 cup 8 grain hot cereal
1/3 cup turbinado sugar
2 1/2 tsp. baking powder
3/4 tsp. salt
1 cup chips

1 package frozen raspberries
8 oz. chopped dark chocolate

1. Preheat oven to 400 degrees.
2. Combine milk, butter, and egg.
3. In a separate bowl, mix flour, sugar, powder, and salt.
4. Add dry ingredients to wet, mixing just until moist. (Leave it lumpy!)
5. Fold in chips and raspberries.
6. Divide batter into greased muffin tins. Bake for 18 minutes, or until a toothpick inserted in center comes out clean (apart from some gooey, delicious melted chocolate).

Saturday, November 29, 2008

Daring Bakers: Caramel Cake with Caramelized Butter Frosting

I decided to prepare this month's Daring Bakers challenge while I was home for Thanksgiving break. This way, I had several more assistants, and many more mouths to feed!

While I enjoyed making and consuming this recipe, its richness demanded minuscule portions. I don't usually remark on a cake being too sweet, this one seriously meant business. If I were to make this another time, I might frost between the cake layers with a lighter, whipped cream icing, and cover it in the caramelized butter frosting, which was very intense (albeit in a good way).

This month's hosts include Dolores, Alex, Jenny, and gluten-free expert Natalie. The recipe comes from Shuna Fish Lydon at Eggbeater.

Caramel Cake

10 Tablespoons unsalted butter at room temperature
1 1/4 Cups granulated sugar
1/2 teaspoon kosher salt
1/3 Cup Caramel Syrup (see recipe below)
2 each eggs, at room temperature
splash vanilla extract
2 Cups all-purpose flour
1/2 teaspoon baking powder
1 cup milk, at room temperature

1.Preheat oven to 350F
2. Butter one tall (2 – 2.5 inch deep) 9-inch cake pan. (I used a 9 x 15 inch jelly roll pan)
3. In the bowl of a stand mixer fitted with a paddle attachment, cream butter until smooth. Add sugar and salt & cream until light and fluffy.
4. Slowly pour room temperature caramel syrup into bowl. Scrape down bowl and increase speed. Add eggs/vanilla extract a little at a time, mixing well after each addition. Scrape down bowl again, beat mixture until light and uniform.
5. Sift flour and baking powder.
6. Turn mixer to lowest speed, and add one third of the dry ingredients. When incorporated, add half of the milk, a little at a time. Add another third of the dry ingredients, then the other half of the milk and finish with the dry ingredients. {This is called the dry, wet, dry, wet, dry method in cake making. It is often employed when there is a high proportion of liquid in the batter.}
7. Take off mixer and by hand, use a spatula to do a few last folds, making sure batter is uniform. Turn batter into prepared cake pan.
8. Place cake pan on cookie sheet or 1/2 sheet pan. Set first timer for 30 minutes, rotate pan and set timer for another 15-20 minutes. Your own oven will set the pace. Bake until sides pull away from the pan and skewer inserted in middle comes out clean. Cool cake completely before icing it (In the jelly roll pan, this cake needed 20 - 25 minutes to bake).

Cake will keep for three days outside of the refrigerator.

Caramel Syrup

2 cups sugar
1/2 cup water
1 cup water (for "stopping" the caramelization process)

1. In a small stainless steel saucepan, with tall sides, mix water and sugar until mixture feels like wet sand. Brush down any stray sugar crystals with wet pastry brush. Turn on heat to highest flame. Cook until smoking slightly: dark amber.
2. When color is achieved, very carefully pour in one cup of water. Caramel will jump and sputter about! It is very dangerous, so have long sleeves on and be prepared to step back.
3. Whisk over medium heat until it has reduced slightly and feels sticky between two fingers. {Obviously wait for it to cool on a spoon before touching it.}

Note: For safety reasons, have ready a bowl of ice water to plunge your hands into if any caramel should land on your skin.

Caramelized Butter Frosting

12 tablespoons unsalted butter
1 pound confectioner’s sugar, sifted
4-6 tablespoons heavy cream
2 teaspoons vanilla extract
2-4 tablespoons caramel syrup
Kosher or sea salt to taste

1. Cook butter until brown. Pour through a fine meshed sieve into a heatproof bowl, set aside to cool.
2. Pour cooled brown butter into mixer bowl.
3. In a stand mixer fitted with a paddle or whisk attachment, add confectioner's sugar a little at a time. When mixture looks too chunky to take any more, add a bit of cream and or caramel syrup. Repeat until mixture looks smooth and all confectioner's sugar has been incorporated. Add salt to taste.

Note: Caramelized butter frosting will keep in fridge for up to a month.
To smooth out from cold, microwave a bit, then mix with paddle attachment until smooth and light.

For decoration, I drizzled the top of my cake with melted bittersweet chocolate.

Thanks, Daring Bakers, for another delicious recipe! Check the rest of the blogs out at http://daringbakersblogroll.blogspot.com/.

Monday, November 24, 2008

Baked Chocolate Doughnuts

As previously mentioned, last weekend my friend Ashley and I bought a huge (1 lb.) chunk of bittersweet Callebaut couverture chocolate at Whole Foods. Our intention was to create chocolate lava muffins! but a busy weekend and several filling meals obstructed this plan. Instead, I chopped the block (roughly) in half on Sunday morning, and we went our separate ways.

Ashley made this amazing (looking) Pain au Chocolat, while I gradually agonized over recipes for a week. On Saturday morning, I had finally decided on chocolate baked yeast doughnuts.

I have a confession to make. These did not turn out as well as I had hoped. However, I'm writing about them since (a) I think you ought to be aware of my failures, (b) the pictures look yummy! and (c) most of all, I think these have promise, and plan to make them again with several alterations, of which I will make note.

Baked Chocolate Doughnuts
Adapted from Heidi's recipe at 101 cookbooks

1 1/3 cups warm milk, 95 to 105 degrees
1 packet instant yeast (if you want to use active yeast, dissolve it in 1/3 cup of the warm milk first)
2 tablespoons butter, melted
2/3 cup sugar
2 eggs
3 cups flour (the original recipe calls for 5 cups. I cut it down to 4 because I was adding some cocoa powder. This was TOO MUCH FLOUR. So I'm reducing it to 3 cups here, and more can be added if necessary.)
3/4 cups cocoa powder
2 oz. bittersweet chocolate, chopped and melted. (I put the chocolate in the microwave for 20 seconds, removed, and stirred until smooth.)
1 teaspoon salt

1. In the bowl of an electric mixer, beat butter and sugar together. Add milk, eggs, and melted, cooled chocolate.
2. Combine the dry ingredients (flour, cocoa, salt, and instant yeast) in a separate container. Gradually add to wet ingredients, stirring by hand, until fully combined.
3. Beat the mixture with the dough hook attachment of an electric mixer, on medium, for several minutes. Add more flour if too wet, more warm milk if too dry. Ideally the dough should "pull away from the sides of the mixing bowl and eventually become supple and smooth."
4. Place the dough into a warm, buttered bowl. Allow to rise for 1 hour. (TIP: I think I've said this before, but my favorite place to let dough rise is in the microwave. I put a damp towel in for thirty seconds, then remove. One dry towel goes over the dough, and the damp, warm towel goes on top of that. Then I put the whole container into the microwave and UNPLUG IT because you never know who might mess with it accidentally.)
5. Turn the dough out onto a floured surface. Roll out until 1/2 inch thick. Cut the doughnuts! I do not have a fancy doughnut cutter, so my assistant and I used a glass and an empty cream soda bottle.
6. Allow the doughnuts to rise for 1 more hour (I use the same method as the first time).
7. Preheat oven to 375 degrees Fahrenheit. Bake the doughnuts for 7 minutes or so. They should be slightly under-cooked! I also baked the doughnut holes for about 3 minutes each.
8. Glaze. I used Alton Brown's chocolate glaze recipe, substituting 1 Tbsp honey for the corn syrup, and it was delicious! Beware, though, it will make twice as much as necessary and you will be continually tempted to stick your finger in it, eat it with a spoon, pour it over fruit...

As I mentioned above, I think the problem with my doughnuts was too much flour. Next time, I will start low and work my way up. I'm also going to try adding slightly more butter and sugar, to increase the richness of the dough. I will let you know how that goes!

Wednesday, November 19, 2008

Basics Part II: Chocolate Cake

I have several recipes for chocolate cake filed away, some from family, others from blogs, still others I've created on my own, or adapted. I discovered this particular recipe when I was searching for a simple and easy way to make chocolate cake: no buttermilk, no beaten egg whites, and no difficult methods. I was living in an apartment I hated, with no electric mixer or quality measuring tools. My need for dessert was pressing. This cake saved me.

I originally baked this in an 8-inch square pan, and drizzled it with a simple glaze. Most of the pieces I cut went straight into the freezer. This, I reasoned, would prevent me from consuming the entire cake in one sitting. As it turns out (lamentably), this perfect concoction is also delicious frozen. I may have to fashion it into cakesicles one day soon.

Perfectly Simple Chocolate Cake

The recipe I give here is with sour cream chocolate frosting, as pictured.

1 cup flour (all purpose or whole wheat pastry)
1 cup sugar (white or turbinado)
1/4 cup butter or margarine (I use Earth Balance)
1/2 cup buttermilk
1/4 cup coffee (optional--if you omit the coffee, use 3/4 cup buttermilk)
1/2 teaspoon baking soda
1/2 teaspoon salt
1/2 teaspoon vanilla
1 egg
2 oz. unsweetened chocolate

1. Preheat oven to 350 degrees.
2. Melt the chocolate in a pan with the butter. Let cool.
3. Combine sugar, coffee, and buttermilk.
4. Add egg and vanilla, then chocolate mixture.
5. Sift the dry ingredients (flour, baking soda, and salt) together and add slowly.
6. Pour batter into greased 8" square pan and bake for 25 minutes, or until toothpick/knife inserted into center comes out clean

Chocolate Sour Cream Frosting

1/3 cup butter
3 oz. unsweetened chocolate
1/2 cup sour cream (TIP: I usually use fat-free for this, and find that it tastes just as good! This goes for most dairy--milk, yogurt, or sour cream--found in recipes.)
2 tsp. vanilla
2-3 cups powdered sugar

1. Melt butter and chocolate in saucepan over low heat. Allow mixture to cool.
2. Stir in sour cream and vanilla.
3. Slowly add powdered sugar, 1/2 cup at a time, and beat until frosting is smooth and spreadable.

Over at Method, my friend Ashley has made some gorgeous vegan Pain Au Chocolat (chocolate croissants) with one half of a big hunk of bittersweet chocolate we purchased this weekend. Check them out, and stay tuned for my own recipe (coming this weekend)!

Monday, November 10, 2008

Earth Muffin Family & Friends II: Deep Dish Veggie Pizza

All right, so I missed the Daring Bakers challenge last month (Pizza Napoletana, hosted by Rosa). To compensate for my ineptitude, I thought I'd share another pizza recipe with you. This is an oft-requested family classic, and one of my father's specialties.

The majority of my favorite memories with my father (also known as "Papa Earth") involve food: licking a sample of his frosting from the beater while he made one of us a birthday cake, or being instructed in the art of some trivial food preparation, such as the proper construction of a lettuce, tomato, and mayonnaise sandwich. It seemed to me, as a child, that he would often deliberately leave partially-prepared food out to tempt us. The plate of shredded mozzarella, or the bowl of resting cookie dough, would taunt us from its hallowed place on the counter, and if we dipped our fingers into these forbidden stores, Dad would always materialize suddenly, shouting "GET outta there!"

Now, of course, he feeds a little scrap of almost EVERYTHING to our dog, a relatively new addition to the family, whom everyone spoils. Their relationship is one of ever-increasing intensity; sometimes I think my father's scorn hurts Apollo's little canine heart more than it ever did ours.

Everyone who knows my family is familiar with the (in?)famous "Daddy Cookies," a recipe handed down from his mother, and a Sunday afternoon tradition at our house since I was little. Dad calls these his "spiritual observance," only half-joking when he admits to not feeling at peace if he cannot make them. I will save those for another post.

Though less well-known, his pizza recipe is just as mind-blowingly good. Once, while visiting, I created a somewhat healthier version, a whole grain, deep-dish concoction full of vegetables. Luckily, Dad is always ready to try something new, standing over my shoulder and providing (sometimes unheeded) suggestions until I have to swat him away with whatever kitchen utensil is most handy.

Deep Dish Veggie Pizza

Part 1: Whole Wheat Pizza Crust

To make this less heavy, I tried using whole wheat pastry flour, which is just made from white wheat instead of red. Because it's meant for lighter baked goods, it doesn't develop gluten as well, so that might not have been the best choice for holding all of the vegetables in this recipe. Regular whole wheat flour would be just as tasty, and probably more structurally sound.

1 package active dry yeast
3/4 cup water
1 tsp sugar
2 cups whole wheat flour
3 Tbsp olive oil

1. Dissolve yeast in water with sugar, mix in flour & oil.
2. Knead for 5 minutes or so. Let rise for 1-2 hours.
3. After first rise, spread into greased pan (I used Pam, in a 9" cake pan). Use the tongs of a fork to pierce the bottom of the crust. Cover with towel and allow to rise for approximately 15 minutes.

Part 2: Veggies

1/2 zucchini
1/2 yellow squash
1 carrot
7 brussel sprouts
10 green beans
1/2 head of broccoli
10 cherry tomatoes
1/2 bag fresh spinach

1. Peel vegetables if necessary, and dice.
2. Steam all but tomatoes, and spinach. I cooked the spinach separately, with some water, and left the tomatoes raw. (TIP: When you're baking something in the oven, you might want to leave the vegetable components slightly undercooked, or "al dente," so they don't become mushy in the final dish.)
3. Mix vegetables, and add spices as desired. (I used basil, salt and pepper.)

Part 3: Sauce

This is the part that's really up to you. I flip-flop between preferring a chunky and a smooth sauce. Dad usually goes with smooth, and he's agreed to share his super-secret sauce recipe with you.

1 can tomato sauce
sugar
salt
pepper
oregano
basil
onion powder
garlic powder
parmesan cheese

1. Add varying amounts of ingredients to taste. This sounds daunting, but I start by adding a dash of each, then tasting. You can't go wrong by starting small and working your way up. The nice thing about this recipe is that, for those of us who don't regularly cook, onion and garlic powders are cheaper, less perishable alternatives to buying onion and garlic whole, which tend to go bad if you don't use all of them. That said, I do advise you to buy garlic, which keeps longer, because it increases the deliciousness of almost all foods by 40-60%! I made that statistic up but you get the idea.

Part 4: The actual pizza!

1 cup mozzarella cheese, shredded
1/2 cup ricotta cheese

1. Preheat the oven to 500 degrees.
2. Pre-bake the crust for roughly 5 minutes.
3. Fill the crust with sauce, vegetables, and cheese, in whatever order you desire.
4. Bake for 6-8 minutes.

Enjoy!

Wednesday, October 15, 2008

Earth Muffin Family & Friends: White Chocolate Berry Blondies with Jen

So here I am again with the berries! This weekend some of my oldest friends descended upon Boston, and I needed (/used this as an excuse) to bake something delicious. My first concoction was mocha frosted cookies, but they are the subject of a future post.

My best friend of fourteen (gah!) years, Jen, arrived late Thursday night. As we leisurely awoke Friday morning, she declared that she wanted to do "whatever you normally do" on days like this. I was slightly ashamed to admit to my usually active and busy friend that this entailed reading in bed and a bowl of oatmeal. And, obviously, BAKING. So we set about trying to find a recipe that was easy, enjoyable, and would feed the rest of the girls.

Success! Jen says: "this recipe combines two of my favorite things: raspberries and white chocolate."

Although the term "blondie" led me to believe these would be as chewy and dense as chocolate brownies, they are in fact more like cake, or quick bread. They are also inexplicably remniscient of cheesecake. In an amazing way.

White Chocolate Berry Blondies
Seriously adapted from this recipe

16 oz. (1 1/3 bags) white chocolate chips
2 tbsp. vanilla extract
1/2 cup butter
1/2 cup shortening
2 1/2 cups flour
4 eggs
1 1/2 teaspoon salt
2/3 cup white sugar

1 bag mixed frozen berries
2 Tbsp sugar
1/4 cup slivered almonds

1. Preheat oven to 350 degrees.
2. Melt the shortening, butter, and white chocolate chips over low heat, stirring constantly.
3. Mix the eggs and sugar together.
4. Combine flour and salt, and add slowly to egg mixture.
5. Finally, mix in cooled white chocolate, in small amounts.
6. Pour batter into a 9 x 13 in. pan. This might also be good as muffins!
7. Bake the batter for 15 minutes, or until the sides of the pan have firmed up.
8. Meanwhile, combine the frozen berries with sugar.
9. Remove the pan from the oven, and sprinkle berry mixture over the batter. Return to oven. (TIP: Allowing the batter to cook for several minutes keeps the berries from sinking. If you wanted to mix the berries in entirely, you might try coating them with flour (in a ziploc bag) before incorporating them. This will help them to stay suspended in the batter.)
10. Bake for another 45 minutes or so, checking occasionally. The blondies are done when a toothpick inserted in the center comes out clean.
11. Sprinkle with slivered almonds and let them cool! They taste 11 times better when they've cooled.

Personally, I am an edge person. Others, like Jen, prefer the middle pieces:

Friday, October 3, 2008

Missed Opportunities


I've only resided in my current city--Somerville, Massachusetts, for around three months. Imagine my surprise when I discovered that one of our claims to fame is the invention of Marshmallow Fluff!

My experience with this confection is limited to several consecutive Christmases of making fudge for all of my friends in high school. This practice became cumbersome in terms of packaging and delivery, and caused a distressing amount of contention, especially among the non-recipients.

This was over five years ago and am I still dwelling on it? AFFIRMATIVE.

There is a Marshmallow Fluff festival here in Somerville! Actually, the proper title is the "What the Fluff" festival. I learned that the festivities included a cooking contest, and I immediately began to devise a recipe to enter. I had a leftover sweet potato in the refrigerator, and I decided to combine these ingredients with another New England favorite: whoopie pies.

Unfortunately, the day of the festival, it rained. And on the rain date (the following day), it also rained. They still held it (you "can't stop the fluff!") but I could not muster up the strength to drag myself out of bed. It may have had something to do with the fact that I was engrossed in a new book, or that I would have been forced to ride my bike three miles in the downpour to actually attend the contest.

What the fluff! I brought these to work, instead. After eating half of them myself.

Chocolate Covered Sweet Potato Whoopie Pies with Marshmallow Fluff Filling

Sweet Potato Cookie
Adapted from a pumpkin cookie recipe in Martha Stewart's Cookies

1 1/2 c. flour
1/2 tsp. baking powder
1/2 tsp. baking soda
3/4 tsp. salt
1 tsp. cinnamon
3/4 tsp. ginger
1/2 tsp. nutmeg
6 Tbsp. butter (3/4 stick)
1 1/8 c. brown sugar
1 egg
3/4 c. cooked, mashed sweet potatoes (NO sugar or milk--just mashed potatoes)
1/2 c. evaporated milk
1/2 tsp. vanilla

1. Preheat oven to 375 degrees.
2. Whisk dry ingredients together.
3. Combine butter and sugar. Beat until fluffy.
4. Add egg, sweet potato, milk, and vanilla one at a time,
5. Add dry ingredients, gradually.
6. Spoon batter onto lightly greased cookie sheet. It will be very wet; this is okay!
7. Bake for 8-12 minutes, depending on size of cookie. (TIP: When making sandwich cookies such as these, it's vital to make them all the same size! You want them to match up. I learned this the hard way...)
8. Allow to cool as you mix filling!


Marshmallow Filling

1 7-oz. jar of Marshmallow Fluff
3/4 c. (1 1/2 sticks) butter
1 1/2 tsp. vanilla
2-3 cups powdered sugar

1. Whip fluff and butter together until creamy. (TIP: I greased my fingers and the spoon before I attempted to extract the fluff from the jar. This made it about 5 times easier.)
2. Add vanilla, and sugar 1/2 cup at a time until desired consistency is achieved. Frosting should be very stiff.
3. Spread on the bottom of one cookie. Sandwich another cookie on top.
4. Place sandwiched cookies in the refrigerator on a cookie sheet to set.

Chocolate Coating
This recipe made enough to coat about 2/3 of the whoopie pies. I liked the taste of the plain ones, too, but if you want to cover them all, you can multiply the recipe by 1.5.

1 12-oz. bag of chocolate chips
1 Tbsp vegetable oil

1. Heat the vegetable oil in the bottom of a medium pot.
2. Add the chips and stir over medium heat, until smooth.
3. Remove your whoopie pies from the fridge, dip in chocolate, and place on cookie sheet. (TIP: you may want to use your finger to smooth the chocolate coating on top, once you've placed the pie on the cookie sheet.)
4. Place in refrigerator to set. I found it easier to keep these refrigerated the whole time, actually.

Here is an example without chocolate coating (equally delicious!):

Saturday, September 27, 2008

My First Daring Bakers Challenge - Lavash Crackers


This is my first month with the Daring Bakers, a group which agrees to all bake the same recipe and post on the same day. This month's recipe, provided by Shel and Natalie was for lavash crackers. This recipe required about half the work of bread, and was absolutely delicious! We were also permitted to concoct our own topping or dip, so I scrounged around my refrigerator for this week's leftovers, and came up with some beans and diced tomatoes, which became a tangy salsa, a perfectly healthy companion for these crackers.


Here is the recipe. For a gluten-free version, you can look to either of the hosts' blogs.

Lavash Crackers
From The Bread Baker's Apprentice by Peter Reinhart
(makes 1 sheet pan of crackers)

1 1/2 cups unbleached bread flour
1/2 tsp salt
1/2 tsp instant yeast
1 Tb agave syrup or sugar (I used sugar
1 Tb vegetable oil
1/3 to 1/2 cup + 2 Tb water, at room temperature (I used 1/2 cup)
Poppy seeds, sesame seeds, paprika, cumin seeds, caraway seeds, or kosher salt for toppings (I used poppy and caraway)

1. In a mixing bowl, stir together the flour, salt, yeast, agave, oil, and just enough water to bring everything together into a ball. You may not need the full 1/2 cup + 2 Tb of water, but be prepared to use it all if needed.

2. Sprinkle some flour on the counter and transfer the dough to the counter. Knead for about 10 minutes, or until the ingredients are evenly distributed. The dough should pass the "windowpane test" and register 77 degrees to 81 degrees Fahrenheit. The dough should be firmer than French bread dough, but not quite as firm as bagel dough (what I call medium-firm dough), satiny to the touch, not tacky, and supple enough to stretch when pulled. Lightly oil a bowl and transfer the dough to the bowl, rolling it around to coat it with oil. Cover the bowl with plastic wrap.

3. Ferment at room temperature for 90 minutes, or until the dough doubles in size. (You can also retard the dough overnight in the refrigerator immediately after kneading or mixing).

4. Mist the counter lightly with spray oil and transfer the dough to the counter. Press the dough into a square with your hand and dust the top of the dough lightly with flour. Roll it out with a rolling pin into a paper thin sheet about 15 inches by 12 inches. You may have to stop from time to time so that the gluten can relax. At these times, lift the dough from the counter and wave it a little, and then lay it back down. Cover it with a towel or plastic wrap while it relaxes. When it is the desired thinness, let the dough relax for 5 minutes. Line a sheet pan with baking parchment. Carefully lift the sheet of dough and lay it on the parchment. If it overlaps the edge of the pan, snip off the excess with scissors.

5. Preheat the oven to 350 degrees Fahrenheit with the oven rack on the middle shelf. Mist the top of the dough with water and sprinkle a covering of seeds or spices on the dough (such as alternating rows of poppy seeds, sesame seeds, paprika, cumin seeds, caraway seeds, kosher or pretzel salt, etc.) Be careful with spices and salt - a little goes a long way. If you want to precut the cracker, use a pizza cutter (rolling blade) and cut diamonds or rectangles in the dough. You do not need to separate the pieces, as they will snap apart after baking. If you want to make shards, bake the sheet of dough without cutting it first.

6. Bake for 15 to 20 minutes, or until the crackers begin to brown evenly across the top (the time will depend on how thinly and evenly you rolled the dough).

7. When the crackers are baked, remove the pan from the oven and let them cool in the pan for about 10 minutes. You can then snap them apart or snap off shards and serve.


Bean Tomato Salsa

1/2 14 oz. can black beans
1/2 can kidney beans
1/2 can cannellini beans
1 14 oz. can diced tomatoes (unsalted)
1/2 tsp. salt
1 tsp. black pepper
1 tsp. cinnamon
1 tsp. apple cider vinegar (lemon or lime juice might work well, also)

1. Combine all ingredients in saucepan and heat through.
2. Mash salsa to desired consistency with a fork.
3. Use a strainer to drain excess liquid, and allow to cool.


Check out the Daring Bakers blogroll for more!

Monday, September 22, 2008

Rise and Shine...


This is not a recipe for those unfathomable "morning people." I've been continually baffled by anyone who professes an affinity for a particular time of day. They all have their moments, certainly, but I find that a great morning or evening is something I'm never able to predict.

When I was in school, my family devised several methods for rousing each other on those dark winter mornings. I remember well being dragged brutally down the stairs by my younger sister, still feebly feigning sleep. And my mother occasionally skipped from room to room, switching on lights, singing: "rise and shine, and give me your glory, glory," a song which I believe she had modified to suit her secular purposes. I may also have lived through a phase of playing Marley's "Get up, Stand up" every single day. This was a trend generally regarded with malice.

Hey! The morning after I made these gingerbread cupcakes with Neufchâtel cheese icing, I woke up early (on a day off!) to photograph them! Cupcakes for breakfast (with apple tea) are exceedingly effective motivation.

As you can see, some of the cupcakes had raisins and apples mixed in. I kept about half plain for those with more discerning tastebuds, although CERTAIN (nine-year-old) people could only manage to lick off the frosting. I hope you never endure the agony that is throwing away your own homemade cupcake, sadly made bare by the caresses of a capricious tongue.

I also hope you never have to write that sentence.

Gingerbread (Apple Raisin) Cupcakes
(Makes 16-24 cupcakes, depending on additions)

1/2 cup brown sugar
1/2 cup butter
1 egg, beaten
1 cup molasses
2 1/2 cups whole wheat pastry flour (TIP: I know I always use this. I've discovered that it works well with baked goods that are darker in color and flavor, particularly spice cakes or ones that contain cinnamon. You won't see me [although I've definitely tried] using wheat flour in lighter recipes like yellow cake or sugar cookies. In these cupcakes, even the pickiest of eaters couldn't taste the whole grains, so go for it!)
1 1/2 tsp. baking soda
2 tsp. ground cinnamon
2 tsp. ground ginger
1 tsp. ground cloves
1 tsp. salt
1 cup warm milk

If you'd like to add apples/raisins:

2 apples, chopped
1 cup raisins

1. Preheat oven to 375 degrees.
2. Combine the dry ingredients (flour, baking soda, salt, and spices).
3. Add the butter in small pieces, and mix.
4. Add, one at a time: egg, molasses, brown sugar, and milk, beating after each addition.
5. If using apple and raisin, fold in.
6. Bake in greased or papered muffin tins for 10-15 minutes. These will bake fast, particularly if they're plain, so be sure to check! They are done when the outside is slightly darkened, and a knife or toothpick inserted in the center comes out clean.


Neufchâtel cheese icing:

1 package Neufchâtel cheese (TIP: You can substitute the familiar cream cheese here, but [American] Neufchâtel tastes similar, and is lower in fat and usually available at the same price.)
1 stick (1/2 cup) butter
1 tsp vanilla extract
2 tbsp milk
2-3 cups confectioners’ sugar

1. Whip butter and cheese together with a whisk (or the whisk attachment on your electric mixer).
2. Add milk and vanilla.
3. Add confectioner's sugar, 1/2 cup at a time, until you reach the desired consistency. Frosting should stand up in stiff peaks, but still be spreadable.
4. Frost and decorate cupcakes! (I used raisins. Chopped nuts would be nice!)


This cupcake entry is part of Sugar High Friday, hosted this month by Fanny, of foodbeam.

Tuesday, September 16, 2008

Presidential Race Tartelettes


I would estimate that I spend up to one third of my waking hours on the computer each day, and one of the most engrossing ways in which I procrastinate or avoid impending work, not including this blog (which, it appears, I have not been very engrossed in at all recently), is reading news and political blogs. This isn't really any more enjoyable than actually completing my work; in fact, it is ultimately less so, because my sense of a looming catastrophe is made even more strong, and I achieve no feeling of accomplishment from fretting over politics. Sometimes we all need a break. This recipe is a break from my break. I don't get much done. Have you noticed?

The title of this post is a stretch, I'll admit, but! These berry tartelettes feature red and blue berries, coexisting peacefully, and making everyone happy. While we watch speech after speech of politicians claiming to have our best interests in mind, these delicious desserts are just WAITING to please.


I baked these over a month ago, and I know that berries like these are no longer in season, and some of us might be disgusted by the artificial, overpriced fruits in the produce section nowadays. The good news is that I'm almost certain that frozen mixed berries would serve just as well!

Also, I will be honest with you--I did not intend, originally, to make tartelettes. I wanted to make turnovers. However, as usually occurs in my kitchen, mistakes were made. I miscalculated how my many changes to this recipe would factor in to the consistency of the dough. And so, I pressed it into muffin tins, filled it with berries, and voila! Still delicious, if slightly less beautiful (than the turnovers, which were hypothetical, anyway).

Nothing is perfect. Except Tina Fey's Palin impression.


Rustic Chocolate Berry Tartelettes
(These are whole grain, and vegan, too!)

2 1/2 cups whole wheat pastry flour
1 cup Earth Balance, chilled
1/2 cup shortening, chilled
2 tsp. salt
1 cup cocoa
1/2 cup sugar (I used turbinado)
1 cup ice water

1/2 pint raspberries
1/2 pint blackberries
1 pint blueberries
(OR 3 cups frozen mixed berries)
3 tbsp. sugar

1. Mix the berries with sugar in a bowl, and place in the refrigerator. This is called "macerating!"
2. Combine flour, salt, cocoa, and sugar.
3. Cut small pieces of the Earth Balance and shortening in with knives, a pastry cutter, or your fingers. (TIP: For any pastry or biscuit dough, the fat needs to be super cold to keep it from melting. I put my EB & shortening in the freezer for a few minutes beforehand! Also, you can use cold water to keep your fingers cold if you're using them to mix.) I have heard that a food processor works for this, but unfortunately I do not own one.
4. When your mixture is a coarse meal with pea-sized chunks, begin to pour ice water (by the tablespoon) into the bowl, kneading until a dough is formed. You may not use all of the water.
5. Cut the dough ball into two equal parts. Wrap in plastic wrap, and refrigerate for 30 minutes.
6. Meanwhile, grease a muffin tin. Preheat the oven to 400 degrees.
7. Unwrap the dough and roll it out on a floured surface. Cut into squares, and press into muffin tins. Fill with berry mixture.
8. Bake for approximately 20 minutes.
9. Allow to cool COMPLETELY (several hours) before removing from the muffin tin. Alternatively, you could bake these in individual molds, and eat them warm straight from the molds.

This makes about 12 tartelettes (enough to fill a muffin tin) if you taste-test the dough, as I did!

Tuesday, September 2, 2008

Indian in Davis Square

My experience with Indian cuisine is severely limited, I'm afraid to admit. Before this year, I'd only eaten at 2 or 3 Indian restaurants, and only from buffets. I'm from a small town, and went to college in a small town, where any type of ethnic cuisine was always at least a 30 minute drive away. My relocation to a big city has been overwhelming in multiple ways, not least of which is the availability of a stunning array of dining options. I'm just beginning to explore Davis Square in Somerville, just a mile from my new apartment, and one place that caught my eye was Diva Indian Bistro.

The Boston Globe's only complaint regarding this restaurant is unreliable service. I have some advice for anyone wishing to avoid this particular nuisance: eat at 4:30 in the afternoon on a Sunday. The dining staff just mills around your table, ready to fill your every need. This was not actually a planned strategy on my part; my Sunday schedule (by which I mean "what time I roll out of bed") can be strange.

So! I ordered the vegetable pakoras (pictured) and Shahi Navratan Korma, "nine different fresh garden vegetables cooked in a creamy sauce w/ almonds, cashews, raisins and spices." The pakoras were crisp and served with a tangy sauce. The main dish, served with rice, was amazing. I have no photo with which to present you, (a) because the ingredients are combined in a such a way that a picture would not be altogether enticing--the whole dish is really only one color--and (b) because I was busy eating. This dish was amazing. I love any combination of cashews with vegetables, and this was no exception. The raisins became plump and sweeter when cooked, and were a sweet surprise in almost every bite. The portion is also larger than sufficient, and (I think) Indian food, particularly curries like this one, make great leftovers.

My omnivore dinner date ordered chicken naan and the Tandoori chicken and was also noticeably pleased.

246 Elm Street
Somerville, MA 02144
(617) 629–4963