Wednesday, October 15, 2008

Earth Muffin Family & Friends: White Chocolate Berry Blondies with Jen

So here I am again with the berries! This weekend some of my oldest friends descended upon Boston, and I needed (/used this as an excuse) to bake something delicious. My first concoction was mocha frosted cookies, but they are the subject of a future post.

My best friend of fourteen (gah!) years, Jen, arrived late Thursday night. As we leisurely awoke Friday morning, she declared that she wanted to do "whatever you normally do" on days like this. I was slightly ashamed to admit to my usually active and busy friend that this entailed reading in bed and a bowl of oatmeal. And, obviously, BAKING. So we set about trying to find a recipe that was easy, enjoyable, and would feed the rest of the girls.

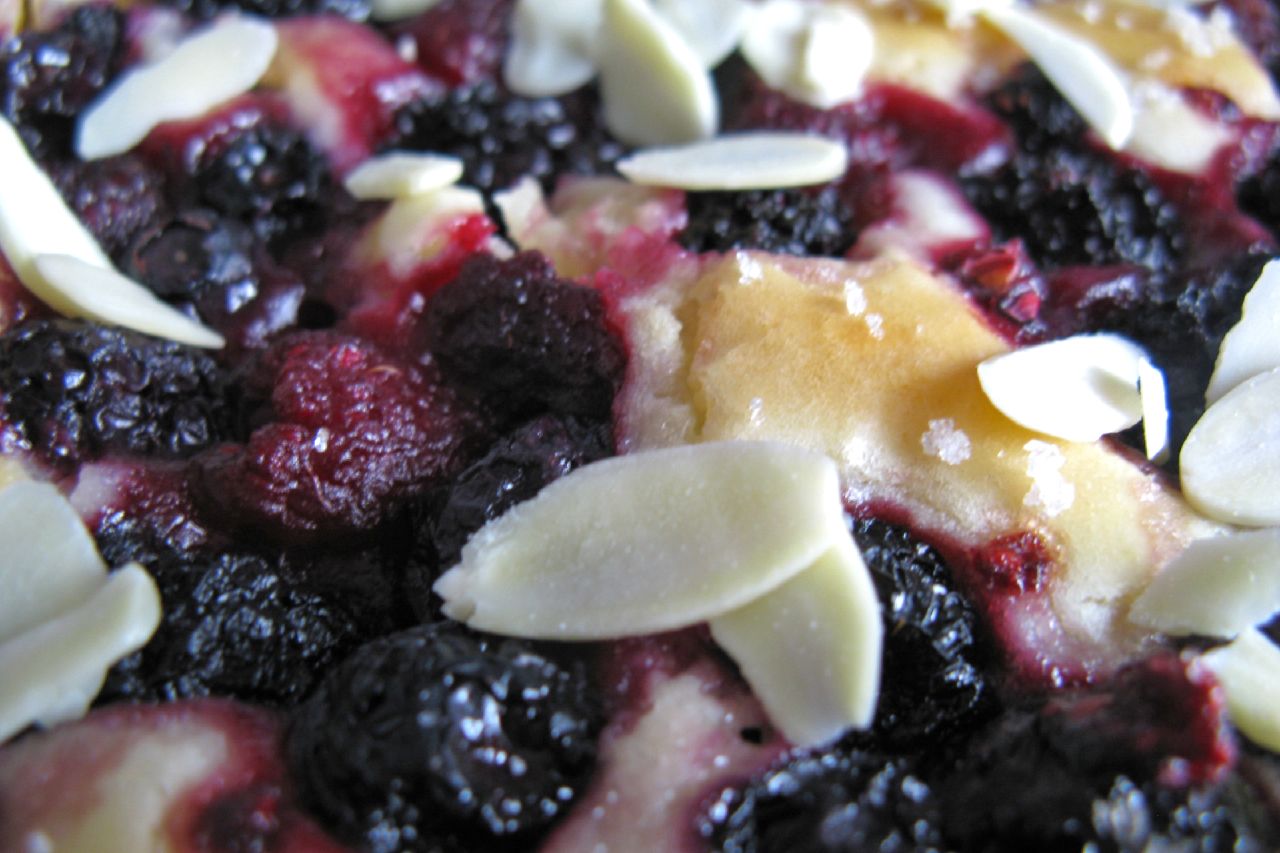
Success! Jen says: "this recipe combines two of my favorite things: raspberries and white chocolate."

Although the term "blondie" led me to believe these would be as chewy and dense as chocolate brownies, they are in fact more like cake, or quick bread. They are also inexplicably remniscient of cheesecake. In an amazing way.

White Chocolate Berry Blondies
Seriously adapted from this recipe

16 oz. (1 1/3 bags) white chocolate chips
2 tbsp. vanilla extract
1/2 cup butter
1/2 cup shortening
2 1/2 cups flour
4 eggs
1 1/2 teaspoon salt
2/3 cup white sugar

1 bag mixed frozen berries
2 Tbsp sugar
1/4 cup slivered almonds

1. Preheat oven to 350 degrees.
2. Melt the shortening, butter, and white chocolate chips over low heat, stirring constantly.
3. Mix the eggs and sugar together.
4. Combine flour and salt, and add slowly to egg mixture.
5. Finally, mix in cooled white chocolate, in small amounts.
6. Pour batter into a 9 x 13 in. pan. This might also be good as muffins!
7. Bake the batter for 15 minutes, or until the sides of the pan have firmed up.
8. Meanwhile, combine the frozen berries with sugar.
9. Remove the pan from the oven, and sprinkle berry mixture over the batter. Return to oven. (TIP: Allowing the batter to cook for several minutes keeps the berries from sinking. If you wanted to mix the berries in entirely, you might try coating them with flour (in a ziploc bag) before incorporating them. This will help them to stay suspended in the batter.)
10. Bake for another 45 minutes or so, checking occasionally. The blondies are done when a toothpick inserted in the center comes out clean.
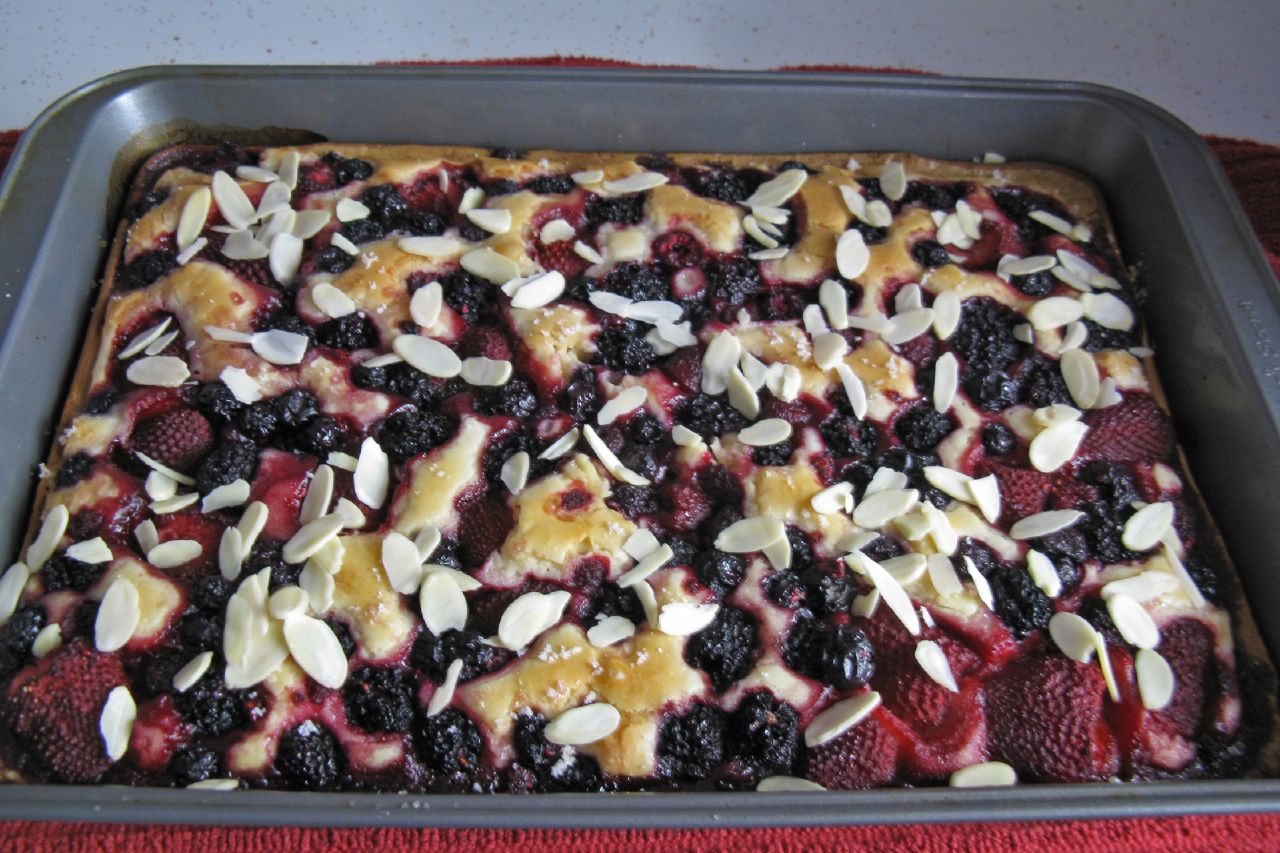
11. Sprinkle with slivered almonds and let them cool! They taste 11 times better when they've cooled.

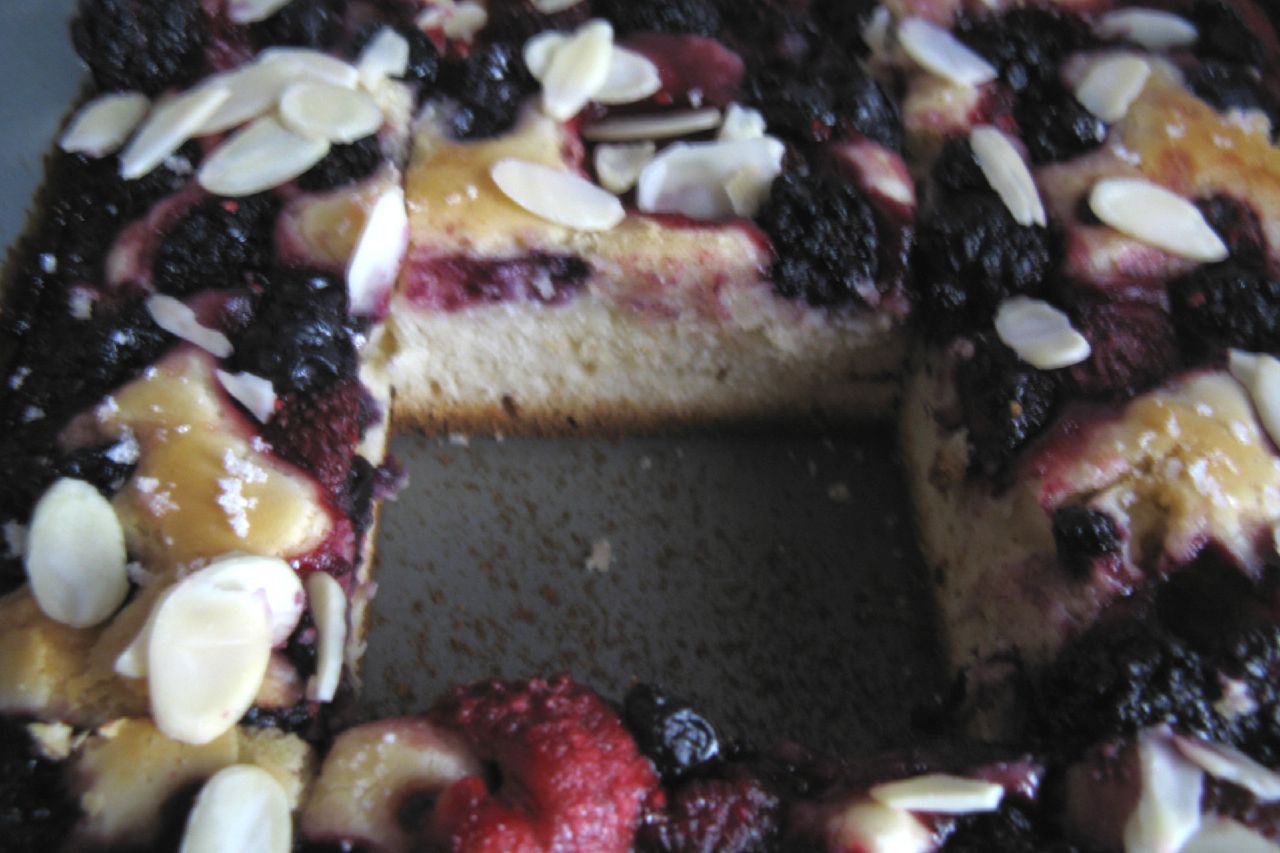
Personally, I am an edge person. Others, like Jen, prefer the middle pieces:

Friday, October 3, 2008

Missed Opportunities


I've only resided in my current city--Somerville, Massachusetts, for around three months. Imagine my surprise when I discovered that one of our claims to fame is the invention of Marshmallow Fluff!

My experience with this confection is limited to several consecutive Christmases of making fudge for all of my friends in high school. This practice became cumbersome in terms of packaging and delivery, and caused a distressing amount of contention, especially among the non-recipients.

This was over five years ago and am I still dwelling on it? AFFIRMATIVE.

There is a Marshmallow Fluff festival here in Somerville! Actually, the proper title is the "What the Fluff" festival. I learned that the festivities included a cooking contest, and I immediately began to devise a recipe to enter. I had a leftover sweet potato in the refrigerator, and I decided to combine these ingredients with another New England favorite: whoopie pies.

Unfortunately, the day of the festival, it rained. And on the rain date (the following day), it also rained. They still held it (you "can't stop the fluff!") but I could not muster up the strength to drag myself out of bed. It may have had something to do with the fact that I was engrossed in a new book, or that I would have been forced to ride my bike three miles in the downpour to actually attend the contest.

What the fluff! I brought these to work, instead. After eating half of them myself.

Chocolate Covered Sweet Potato Whoopie Pies with Marshmallow Fluff Filling

Sweet Potato Cookie
Adapted from a pumpkin cookie recipe in Martha Stewart's Cookies

1 1/2 c. flour
1/2 tsp. baking powder
1/2 tsp. baking soda
3/4 tsp. salt
1 tsp. cinnamon
3/4 tsp. ginger
1/2 tsp. nutmeg
6 Tbsp. butter (3/4 stick)
1 1/8 c. brown sugar
1 egg
3/4 c. cooked, mashed sweet potatoes (NO sugar or milk--just mashed potatoes)
1/2 c. evaporated milk
1/2 tsp. vanilla

1. Preheat oven to 375 degrees.
2. Whisk dry ingredients together.
3. Combine butter and sugar. Beat until fluffy.
4. Add egg, sweet potato, milk, and vanilla one at a time,
5. Add dry ingredients, gradually.
6. Spoon batter onto lightly greased cookie sheet. It will be very wet; this is okay!
7. Bake for 8-12 minutes, depending on size of cookie. (TIP: When making sandwich cookies such as these, it's vital to make them all the same size! You want them to match up. I learned this the hard way...)
8. Allow to cool as you mix filling!


Marshmallow Filling

1 7-oz. jar of Marshmallow Fluff
3/4 c. (1 1/2 sticks) butter
1 1/2 tsp. vanilla
2-3 cups powdered sugar

1. Whip fluff and butter together until creamy. (TIP: I greased my fingers and the spoon before I attempted to extract the fluff from the jar. This made it about 5 times easier.)
2. Add vanilla, and sugar 1/2 cup at a time until desired consistency is achieved. Frosting should be very stiff.
3. Spread on the bottom of one cookie. Sandwich another cookie on top.
4. Place sandwiched cookies in the refrigerator on a cookie sheet to set.

Chocolate Coating
This recipe made enough to coat about 2/3 of the whoopie pies. I liked the taste of the plain ones, too, but if you want to cover them all, you can multiply the recipe by 1.5.

1 12-oz. bag of chocolate chips
1 Tbsp vegetable oil

1. Heat the vegetable oil in the bottom of a medium pot.
2. Add the chips and stir over medium heat, until smooth.
3. Remove your whoopie pies from the fridge, dip in chocolate, and place on cookie sheet. (TIP: you may want to use your finger to smooth the chocolate coating on top, once you've placed the pie on the cookie sheet.)
4. Place in refrigerator to set. I found it easier to keep these refrigerated the whole time, actually.

Here is an example without chocolate coating (equally delicious!):